Showing posts with label homemade. Show all posts

Monday, June 18, 2012

Pure blue heaven


 I just finished up making a batch of homemade Blueberry syrup and canning it.

Wow was it a messy task to do. Then I finally decided that it was too much work and to much waste of the berries to make syrup and I just wouldn't do it again.


Wrong answer sista!!! This stuff is out-of-this-world delicious! I tasted just a tiny bit out of the pan after I filled the jars and OH MY GOODNESS! Immediately, I knew I would be going to the store tomorrow, the last day of the sale on blueberries, and get tons more!

I used about 8-9 cups of fresh blueberries (5 pints). I did a quick process in my food processor to chop them up some. Then I put them in a large pan with 2 Tablespoons of fresh squeezed lemon juice. On low/medium heat, I let this simmer for about 10 minutes, stirring often. After allowing the berry mixture to cool down some, I put them in my wire mesh strainer to drain out all of the clear juice.

{Side note here} I should have used cheesecloth, but I couldn't find mine at the time. Instead I used a paper towel to line the strainer and it.took.forever.

After draining the berries to get out all the juice possible (I got between 2.5 and 3 cups), mix in 4.5 cups of sugar and cook over low/medium heat for about 5-8 minutes or until all sugar is completely dissolved and mixture is bubbly. I ended up with 5.5 eight ounce jars of syrup.

Pour into your sterile jars and process in a hot water bath canner for 10 minutes.

I never dreamed it would be so good.


It is late and I was hungry after finishing so...I HAD to try this beautiful syrup.There was this one jar that wasn't full, so I just drizzled some on my organic yogurt.


So delicious!


I will be headed out tomorrow morning for more blueberries. I refuse to go through so much mess next time I make the syrup, though.


This recipe works for any type of berries.


Hope your week is wonderful!


Saturday, June 16, 2012

In my world right now

Our new home (manufactured home) is on the local lot and awaiting it's time for set-up and delivery!!!  David, the kids and I are so excited! We have decided to buy a new lot and have the new house put there, instead of on the existing land I am on. That way, we can do everything the way WE want it, not having to convert horse barns, trees where we wouldn't have put them, etc.  We will then either remodel and rent this little place or sell it. We haven't made that decision yet. It does need quite a bit of work on it. So, we will see.


So, I have begun the process of getting things sorted out, trashed, sold/given away and packed. I have moved so many times in the past 6 years since moving to Amarillo, you would think it would be an easy task for me. It's not. Never will be. The older get, the less organized I am and it just stinks.

On a great note, though, once we get into the new house, I will finally have a studio! A place to work and call mine. I am working to release a new product line of baby/child items and I will finally have the space to do what I love to do!

We are ordering one of those "Amish built" wood portable storage type buildings and will "build it out" into my studio/guest room/bathroom over the course of a little time.


This photo is awful, I took it with my cell phone and just couldn't get a good shot. This one is NOT ours. It is just what ours will look like from the front. I am torn between a metal or shingle roof. But ours will be painted to match our new house. These are so reasonably priced, rent-to-own in 3 or 5 years(your choice), with no credit check. Pay for it and keep it as long as you like...or pay it off and keep it forever.  So easy!

Ours will have my studio, guest room and a 3/4 bath on the ground floor, then storage galore in the attic area! There is even a neat ledge on the front inside that will be a gorgeous place for plants and displaying my creations. I am so excited!

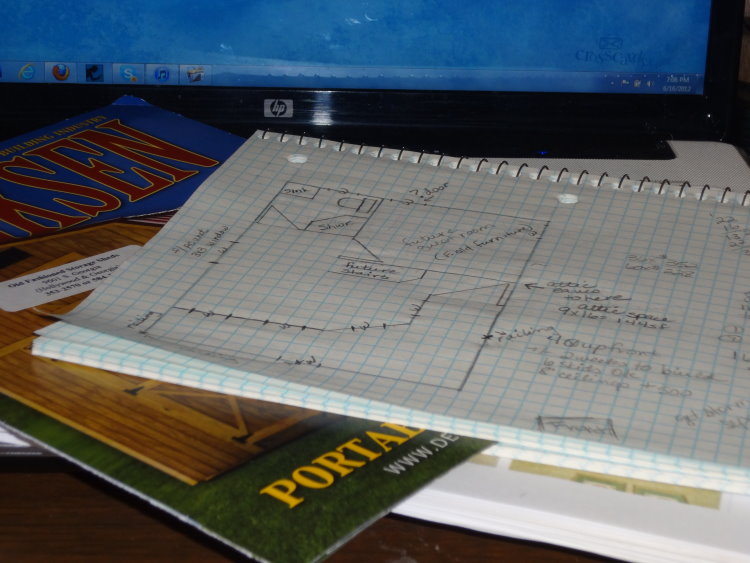
Working on the layout. I love designing floor-plans of houses (or buildings of any type).


I have also been busy a little with continuing my knitting journey...


Remember back in May, I made my first knitted project (dish cloth) while on the road to Louisiana? I so love making these! Quick and easy. Just the way I like it at this point.

I am also working on a crochet afghan for our new grand-son due the end of this month.


My garden....it's taken quite a beating. Since we decided to buy a new piece of land, I never got things out of pots and into a garden properly, so nothing has done much of anything. Next year will be different!

Here's hoping the weekend is wonderful for you and yours.

Saturday, June 2, 2012

Lemony kind of day


Ah fresh squeezed lemon juice. Beautiful! This juice is for fresh homemade lemonade. The juicer...it belonged to my mother and has been around for as long as I can remember. It is likely at least 50 years old. I love the thing!


Lemon peels. These will be made into lemon infused vinegar for household cleaning.


"King of the lemon peels"!!! Well actually, this cute little 4oz jelly car of fresh squeezed lemon juice will go into jam tomorrow.


Fresh squeezed, freshly made lemonade. Yum! How do ya like that neat glass pitcher? Under 5 bucks at everyone's favorite (or not) Supercenter. 1/2 cup of lemon juice, 1/2 cup of sugar and 7 cups of water. So easy!


This, my dear friends, will be some of the most awesome household cleaner known to women(or whomever cleans house). I just dug all of the fleshy part out and cut the peels up in half or so. Put them into a pint jelly jar and filled it to the top with vinegar. It will sit for a couple of weeks and voila! See the lemon seeds? Ima gonna see if they will grow. Likely not, but hey, can't blame a gal for trying.


Heck, I even had on a lemon yellow t-shirt. I just love this shirt! It came from one of my most favorite stores, Tractor Supply. Oh and I didn't plan all of this lemon-y goodness around my shirt....it's just what I picked to put on this morning.


Lemon blossoms SMELL.SO.GOOD! I bought myself a Meyer lemon tree about a month ago. I have often been curious about Meyer lemons. I know they have a distinct shape, are much larger than typical lemons and are quite spendy.


Baby lemon!!! The tree has likely around 15 little tiny babies on it! So...on with the story about Meyer lemons. So since I was curious, I put a post on Facebook and lo and behold...got all the scoop on Meyer lemons: "Meyers Lemons are have a slightly higher sugar content (because they are a cross between an orange and a lemon), are more spherical and have thinner peels. They are a hybrid so if looking for "heirloom" - go the other route. Meyer's also get a lot taller than regular lemon trees (15' vs. 8-10'). I like Meyer's for lemonade, but not as much for baking."

So there you have it. A lemony kind of day.


Tomorrow's agenda: Apricot Jam

Friday, March 9, 2012

Laundry Soap - Update

You can read my first post on this subject here.

I made a batch of homemade laundry soap this week. Well, actually 1 and 2/3 batches. I already had on hand partial boxes of ingredients, and wanted to use them up.

I used my friend, Sandra's recipe that you can find here. I did not use the Purex crystals, though. I prefer to stick with vinegar for my rinse and wool dryer balls in the dryer. My clothes come out smelling....clean. That's all. Just clean.


Please do visit Sandra's blog (you will love it!), but here is the recipe, also.

4 lb 12 oz box of Borax
4 lb box Arm & Hammer Baking Soda
3 lb 7 oz box Arm & Hammer Super Washing Soda
3 bars of Fels-Naptha soap (or Zote), grated
3 lb container of Oxy Clean, or two of the smaller ones, to make about 3lbs
1 container Purex Crystals

I like this recipe because it uses the entire containers of the ingredients, so there's not a bunch of open boxes sitting around in the laundry room.

I purchased a two pack of coffee scoops at the dollar store that are 1/8c. They work perfectly for scoops for this. Probably a bit over the 1-2T recommended use, but that is ok.


The tub that I got for my laundry soap cost me $5.47 at W*lmart. It has a locking lid, so there shouldn't be any accidental spills. I got a second one to keep my wool dryer balls in and a larger one to keep...well haven't decided yet...in.

So I love this homemade laundry soap. It's so much better on the budget, better on your clothes and so much better for the environment!

As I mentioned before, for the rinse I use a *glug* (probably around 1/3 cup) of vinegar in my rinse. LOVE IT!

Monday, March 5, 2012

Wool Dryer Balls

I have wanted to make some of these for quite a long time.

Again, Sandra beat me to it; even with a tutorial on her blog.

Last night, I pulled out the wool yarn and started creating.

Here are some before I felted them.


And here's the ones I have already felted.


I had a bunch of leftover wool yarn on hand, so I just made wool balls until I thought I was done, then I found enough more wool yarn to make probably 15-20 more!

Now, I tried something a little different than Sandra didn't do in her tutorial. For the center "core" I wound the yarn very tightly for the first 1/4 of the ball on some, others I didn't. I found that the ones with the tighter wound core were a bit heavier (and bouncier), so I think they may do better in the dryer. Also, I used panty hose, and instead of tying with string, I just knotted the hose very close to each ball as I put it inside the hose. After they were felted, I just cut the hose to get them out. You will likely find some of the wool balls stuck to the hose when you attempt to remove them. That is fine, just pry the hose off and it's ready to go.

Sunday, March 4, 2012

Homemade laundry soap

I know that there are many, many recipes on the internet for homemade laundry soap.

Here in the Texas panhandle, though, I am not able to use homemade laundry soap. The water is awful and everything ends up gray after a few weeks of use. I DO NOT blame the laundry soap, I know for sure it is our water.

I have tried the powder (dry) one on a couple of occasions and liked it just fine.

Then last summer, once I moved into this little place, I tried the liquid(aka: gel) recipe used by Michelle Duggar. Her recipe is here. I really liked how far the liquid formula makes the ingredients last.

When I was home in Leesville, LA a couple of weeks ago, I was telling my oldest sister about it. She wasn't certain about the washing soda (NOT baking soda) so I told her I would send her photos. So instead, I am doing this post for her :-)


I often see comments that Zote works equally well, if you cannot find the Fels-Naptha.


I took these photos at W*lmart. All four locations here in Amarillo carry these items now. I guess there was finally enough requests for them. Hopefully all locations nationwide now carry them.

Some add O*yClean or other whiteners or boosters. I have never added them. One of my main reasons for using homemade laundry soap is to save money. By adding those extra items, it drives up the cost of ingredients.

If you plan to use the liquid recipe, if you cannot locate a 5gal. bucket for free at a food establishment, W*lmart has them (be sure to grab the lid) in the paint department for around $4.00.

For rinsing, I use *gulg* of vinegar in each rinse. How much is a glug, you ask? I would estimate about 1/3 cup or so. I love how the laundry feels and is soft using vinegar (and there is NO VINEGAR SMELL on the clothes at the end of the rinse/spin cycle). Either white or apple cider is fine.


 I plan to return to using the homemade laundry soap very soon.

Tuesday, June 7, 2011

Homemade Yogurt

On one of my favorite websites (Backyard Chickens), I found a fantastic and EASY PEASY way to make homemade yogurt! No machines required! I love mine with just a drizzle of honey on it. YUM!


Easy Homemade Yogurt Recipe

I am not posting the actual recipe because, if you read through the thread, there are so many tips and suggestions for this yogurt.

It's one of the easiest recipes I've found to make yogurt and uses no machines.

Saturday, November 27, 2010

Ugly as...

Homemade Soap!

I made this yummy hot process soap in my crock pot the other day! Here's one place with a tutorial. There are also many, many more links with tutorials, just google "crock pot soap" for detailed instructions by many individuals. I attended a class by a local homeschool mom, where I got the information I used to make mine.


Here's the recipe I made up and used. I used the lye calculator at Majestic Mountain Sage so that I had the precise measurements. Here's a direct link to the calculator.
Amy's Almost Castile Soap

Amys Almost Castile Soap

Created by Amy Harrett

Service provided by Majestic Mountain Sage
http://www.thesage.com
© 1996-2010 Majestic Mountain Sage, All Rights Reserved

Liquids

WATER
For the size of fat batch that you are using, we recommend that you use approximately 7 to 10 fluid ounces of liquid.
WARNING: Always add your solid form lye, sodium hydroxide or potassium hydroxide, to the liquid. If the liquid were added to the solid form lye a violent reaction could result. This means you could have a "volcano" erupt out of your container.

Fats & Oils

Fat Amount
(oz wt)
% in
recipe
Coconut Oil 7 25.00
Olive Oil 21 75.00
Total Weight 28

Lye Table (NaOH)

% excess fat Lye Amount
(oz wt)
0 4.13
1 4.09
2 4.05
3 4.01
4 3.97
5 3.93
6 3.88
7 3.84
8 3.80
9 3.76
10 3.72
0% to 4% excess fat range: Proceed with caution! We do not recommend this unless actual saponification values are known and used.
5% to 8% excess fat range: This is the range we use most often.
9% to 10% excess fat range: Creates a softer soap because of the amount of excess fat.
DISCLAIMER: Every effort has been made to ensure that the information contained here is accurate. However due to differing conditions, tools, and individual skills we cannot guarantee the information is applicable in your situation. We are not responsible for any injuries, losses, or other damages that may result from the use this information available here.
Always wear protective goggles, gloves and other safety clothing when handling sodium hydroxide or potassium hydroxide. Refer to the appropriate MSDS for complete details.

Basic Soapmaking Instructions

  • While wearing safety goggles and neoprene gloves, combine solid lye and liquid, stir well. Set aside and allow to cool (100° F to 125° F). This is best done outside while you are standing upwind.
  • Combine oils and heat gently. Once the fats and oils are melted allow the temperature to drop to 100° F to 125° F.
  • Combine lye solution and melted oils. Be careful not to splash while combining the mixtures. Stir until the mixture traces. If tracing takes more than 15 minutes, which it often does, stir for the first 15 minutes, then stir for 5 minutes at 15 minute intervals. Tracing looks like a slightly thickened custard, not instant pudding but a cooked custard. It will support a drop, or your stir marks for several seconds. Once tracing occurs...
  • Pour raw soap into your prepared molds. After a few days the soap can be turned out of the mold. If the soap is very soft, allow it to cure for a few days to firm the outside.
  • Cut soap into bars and set the bars out to cure and dry. This will allow the bar to firm and finish saponification. Place the bars on something that will allow them to breathe.

This was a small batch. At our class, the batch done was twice this size, but I wanted to use the oils I had on hand, and didn't have enough to do a larger batch. I got 12 nice size bars from my batch.

I also added essential oils of Rosemary and Spearmint. I didn't measure these, I just added them until I got the strength of scent I liked, stirring them into the soap well, before putting soap in the mold.
I really don't think my soap is ugly, I just LOVE it! Have fun making your own!